This article delves into effective methods to turn off your check engine light (CEL), providing you with practical solutions and insights that can help you efficiently diagnose and resolve issues with your vehicle. The check engine light is an important indicator of your car’s health, and understanding how to handle it can save you time and money.
Understanding the Check Engine Light
The check engine light serves as your vehicle’s warning system, alerting you to potential issues with the engine or emissions system. Recognizing its purpose is crucial for timely maintenance. Ignoring this light can lead to more significant problems down the road.
Common Reasons for Check Engine Light Activation
- Loose or Damaged Gas Cap: A loose or damaged gas cap is one of the most common and easily fixable issues that can trigger the check engine light. Ensuring a tight seal can often resolve the problem immediately.
- Faulty Oxygen Sensors: Oxygen sensors monitor the air-fuel mixture in your engine. A malfunction can lead to poor fuel efficiency and increased emissions, triggering the check engine light.
- Engine Misfires: Misfires can occur due to faulty spark plugs or ignition coils, leading to reduced engine performance and triggering the CEL.
- Exhaust System Issues: Problems in the exhaust system, such as a damaged catalytic converter, can also activate the check engine light.
Using an OBD-II Scanner to Diagnose Issues
An OBD-II scanner can read diagnostic trouble codes (DTCs) stored in your vehicle’s computer, helping you identify the specific issue causing the check engine light to illuminate. This tool is invaluable for DIY mechanics and can save you a trip to the mechanic.
How to Use an OBD-II Scanner
Using an OBD-II scanner is straightforward. Simply plug the device into the vehicle’s OBD-II port, turn on the ignition, and read the codes displayed. This will give you a clearer understanding of the underlying issue.
Interpreting Diagnostic Trouble Codes
Each DTC corresponds to a specific problem. Understanding these codes can guide you in determining whether a simple fix is possible or if professional assistance is required. Many online resources are available to help you interpret these codes.
Resetting the Check Engine Light
Once the underlying issue is resolved, you may need to reset the check engine light. This can often be done using an OBD-II scanner or by disconnecting the battery temporarily.
Resetting with an OBD-II Scanner
After addressing the issue, you can use the OBD-II scanner to clear the codes, effectively turning off the check engine light and ensuring your vehicle’s systems are functioning correctly.
Resetting by Disconnecting the Battery
Disconnecting the battery for a few minutes can reset the vehicle’s computer and turn off the check engine light. However, this method may also reset other electronic systems in your vehicle, so proceed with caution.
When to Seek Professional Help
If the check engine light remains illuminated after attempting these solutions, it may indicate a more serious issue requiring professional diagnosis and repair. Understanding when to seek help is vital for vehicle maintenance. Always err on the side of caution when it comes to your car’s health.
In conclusion, being proactive about your vehicle’s maintenance can prevent small issues from becoming costly repairs. By understanding the check engine light and utilizing the right tools, you can keep your vehicle running smoothly.

Understanding the Check Engine Light
The check engine light (CEL) is an essential component of your vehicle’s onboard diagnostics system. It acts as a warning signal, alerting drivers to potential issues that could affect the engine’s performance or the emissions system. Understanding the significance of this light is crucial for maintaining your vehicle’s health and ensuring it operates efficiently.
When the CEL illuminates, it can be concerning, but it’s important to remember that it doesn’t always indicate a severe problem. The light can be triggered by a variety of factors, some of which are minor and easily resolved. Familiarizing yourself with the common causes of CEL activation can help you respond appropriately and avoid unnecessary repairs.
There are numerous reasons why your check engine light may come on. Here are some of the most frequent culprits:
- Loose or Damaged Gas Cap: This is one of the simplest issues to address. A loose gas cap can lead to fuel evaporation, which triggers the CEL.
- Faulty Oxygen Sensors: These sensors monitor the air-fuel mixture and can affect both fuel efficiency and emissions if they malfunction.
- Malfunctioning Catalytic Converter: A failing catalytic converter can severely impact your vehicle’s performance and emissions, necessitating immediate attention.
- Engine Misfires: Misfiring can occur due to various reasons, including ignition system issues or fuel delivery problems.
To effectively address the check engine light, utilizing an OBD-II scanner is highly recommended. This tool connects to your vehicle’s diagnostic port and retrieves diagnostic trouble codes (DTCs) that can pinpoint the underlying issue.
Using an OBD-II scanner is straightforward:
- Locate the OBD-II port, usually found beneath the dashboard on the driver’s side.
- Plug in the scanner and turn on the ignition without starting the engine.
- Follow the scanner’s instructions to read the codes displayed on the screen.
Each DTC corresponds to a specific issue within your vehicle. Understanding these codes can help you determine if the problem is something you can fix yourself or if you need to seek professional assistance.
Once you’ve addressed the underlying issue, you may need to reset the check engine light. This can often be accomplished using your OBD-II scanner or by disconnecting the vehicle’s battery.
After resolving the problem, use the scanner to clear the codes. This action will turn off the check engine light and help ensure your vehicle’s systems are functioning correctly.
If you don’t have access to an OBD-II scanner, disconnecting the battery for several minutes can also reset the vehicle’s computer. However, be aware that this may also reset other electronic systems in your vehicle.
If the check engine light remains on after you’ve attempted these solutions, it may indicate a more serious issue that requires professional diagnosis and repair. Ignoring persistent warning lights can lead to more significant problems down the line, so it’s essential to act promptly.
By understanding the check engine light and the potential issues it represents, you can take proactive steps to maintain your vehicle’s performance and longevity. Regular diagnostics and timely repairs can save you money and ensure a smoother driving experience.

Common Reasons for Check Engine Light Activation
The check engine light (CEL) is a crucial indicator of your vehicle’s health, alerting you to potential issues that may require attention. Understanding the common reasons for its activation can help you address problems early, ensuring your vehicle operates efficiently and safely. Below are some of the most prevalent causes for the check engine light to illuminate.
- Loose or Damaged Gas Cap: One of the most frequent triggers of the check engine light is a loose or damaged gas cap. This minor issue can lead to fuel evaporation, which not only affects fuel efficiency but also causes the light to turn on. Always ensure your gas cap is tightened properly.
- Faulty Oxygen Sensors: Oxygen sensors are vital for monitoring the air-fuel mixture in your engine. A malfunctioning sensor can lead to decreased fuel efficiency and increased emissions, prompting the check engine light to activate. Replacing faulty sensors is essential for optimal performance.
- Malfunctioning Catalytic Converter: The catalytic converter plays a critical role in reducing harmful emissions. If it’s not functioning correctly, it can cause the check engine light to come on. Symptoms of a failing catalytic converter include reduced engine performance and unusual exhaust smells.
- Defective Mass Air Flow Sensor: This sensor measures the amount of air entering the engine to ensure the correct fuel-to-air ratio. If it fails, it can lead to poor engine performance and increased emissions, triggering the check engine light.
- Worn Spark Plugs or Wires: Spark plugs and their associated wires are essential for ignition. If they are worn or damaged, it can lead to misfires and poor fuel combustion, causing the check engine light to illuminate.
- Engine Misfire: An engine misfire occurs when the fuel in the engine does not ignite properly. This can result from various issues, including faulty spark plugs, fuel injectors, or ignition coils. A misfire can significantly impact performance and trigger the check engine light.
- Transmission Issues: Sometimes, the check engine light can indicate problems with the transmission. Issues such as low transmission fluid or faulty sensors can trigger the light, signaling the need for immediate attention.
Identifying the cause of the check engine light is essential for effective resolution. Ignoring this warning can lead to more severe problems down the line, resulting in costly repairs and decreased vehicle performance. Regular maintenance and timely inspections can help prevent many of these issues from arising.
For vehicle owners, understanding these common triggers can empower you to take proactive steps. If you notice your check engine light is on, consider starting with the simplest solutions, such as checking your gas cap or inspecting your spark plugs. If the light persists, using an OBD-II scanner can provide valuable insights into the specific issues at hand.
In summary, being aware of the common reasons for check engine light activation can help you maintain your vehicle’s health and safety. From minor fixes to more complex issues, addressing these triggers promptly can save you time and money in the long run.
Loose or Damaged Gas Cap
The check engine light is an essential alert system in your vehicle, indicating potential problems that require attention. One of the most common triggers for this light is a . This seemingly minor issue can lead to significant consequences if not addressed promptly. In this section, we will explore the signs of a faulty gas cap, how it affects your vehicle, and practical steps to resolve the issue.
It’s important to be aware of the signs that indicate your gas cap may be malfunctioning. Common symptoms include:
- Fuel Odors: A noticeable smell of gasoline can indicate that fuel vapors are escaping due to a poor seal.
- Decreased Fuel Efficiency: A faulty gas cap can lead to increased evaporation of fuel, resulting in lower miles per gallon.
- Check Engine Light Activation: As mentioned, a loose or damaged gas cap is one of the most frequent reasons for the check engine light to illuminate.
Addressing a gas cap issue is often straightforward and can save you time and money. Here’s how to proceed:
- Inspect the Gas Cap: Check for any visible signs of damage, such as cracks or wear.
- Tighten the Cap: If the cap is loose, simply twist it until it clicks into place, ensuring a tight seal.
- Replace if Necessary: If the gas cap is damaged, purchase a new one that fits your vehicle model and install it.
These steps can often turn off the check engine light immediately without further troubleshooting.
A gas cap is not just a cover; it plays a crucial role in maintaining your vehicle’s fuel system. A proper seal prevents fuel vapors from escaping into the atmosphere, which is vital for both environmental reasons and vehicle performance. A damaged or loose gas cap can lead to:
- Increased Emissions: Fuel vapor leaks contribute to air pollution, which can harm the environment.
- Engine Performance Issues: A faulty gas cap can disrupt the pressure balance in the fuel tank, affecting engine performance.
If you have tightened or replaced your gas cap and the check engine light remains illuminated, it may be time to consult a professional mechanic. Persistent issues could indicate deeper problems within the fuel system or other engine components. A mechanic can perform a thorough diagnostic check to identify and resolve any underlying issues.
In summary, a loose or damaged gas cap is a common issue that can be easily fixed. By ensuring a proper seal, you can often resolve the check engine light activation immediately. However, being aware of the signs of a faulty gas cap and understanding the importance of its function can help maintain your vehicle’s performance and efficiency.
Signs of a Faulty Gas Cap
When it comes to your vehicle’s performance, even the smallest components can have a significant impact. One such component is the gas cap. A faulty gas cap can lead to a variety of issues that may affect your car’s efficiency and emissions. Understanding the signs of a faulty gas cap can help you address problems before they escalate.
If your gas cap is cracked, damaged, or not sealing properly, you may experience several noticeable symptoms:
- Fuel Odors: One of the most immediate signs of a faulty gas cap is the presence of fuel odors. If you detect a strong smell of gasoline, it could indicate that the gas cap is not sealing correctly, allowing fumes to escape.
- Decreased Fuel Efficiency: A compromised gas cap can lead to a decrease in fuel efficiency. When the cap fails to create a proper seal, it can cause the fuel system to work harder, resulting in increased fuel consumption.
- Check Engine Light Activation: As mentioned earlier, a damaged gas cap can trigger the check engine light (CEL). This warning light serves as a signal that something is amiss, and a faulty gas cap is often one of the simpler issues to resolve.
- Moisture in the Fuel System: A damaged gas cap can allow moisture to enter the fuel system, leading to potential corrosion and other issues. This can affect the overall performance and longevity of your vehicle.
- Excessive Engine Emissions: A malfunctioning gas cap can contribute to increased emissions from your vehicle. This is not only harmful to the environment but may also lead to failing emissions tests.
Recognizing these signs early can save you time and money. If you suspect that your gas cap is the issue, it is advisable to inspect it regularly. Look for any visible cracks, ensure that it fits snugly, and check the rubber seal for wear and tear. Regular maintenance of your gas cap can prevent more significant problems down the line.
In many cases, fixing a gas cap issue is straightforward:
- Tighten the Cap: If you find that the gas cap is loose, simply tightening it can often resolve the problem. Make sure it clicks into place to ensure a proper seal.
- Replace if Damaged: If the cap is cracked or the seal is worn out, replacing it is the best option. Gas caps are relatively inexpensive and can be found at most auto parts stores.
By addressing a faulty gas cap promptly, you can improve your vehicle’s performance and avoid unnecessary repairs. Regular checks and maintenance can lead to a smoother driving experience and better fuel economy, ensuring your vehicle runs efficiently.
How to Fix a Gas Cap Issue
The gas cap plays an essential role in your vehicle’s fuel system, ensuring that fuel vapor does not escape and that the fuel tank maintains the correct pressure. A malfunctioning gas cap can lead to various issues, including triggering the check engine light (CEL). In this section, we will explore how to effectively address gas cap issues, ensuring your vehicle runs efficiently.
Fixing a gas cap issue is often a straightforward process that can save you time and money. Here are the steps you should follow:
- Tighten the Gas Cap: First, ensure that your gas cap is securely tightened. A loose gas cap is one of the most common reasons for the CEL to activate. Turn the cap clockwise until you hear a click, indicating it is properly sealed.
- Inspect for Damage: If tightening the cap does not resolve the issue, inspect it for any visible signs of damage. Look for cracks, dents, or worn-out seals that may prevent it from sealing correctly.
- Replace if Necessary: If you notice any damage, it is advisable to replace the gas cap. Most gas caps are relatively inexpensive and can be purchased at auto parts stores or online. Ensure you select the right cap for your vehicle make and model.
Recognizing the signs of a faulty gas cap can help you address the issue before it escalates. Common indicators include:
- Fuel odors around the vehicle, indicating vapor leakage.
- Decreased fuel efficiency, as a faulty cap can affect the fuel system.
- Activation of the check engine light, which may prompt further investigation.
Addressing gas cap issues is not just about turning off the CEL. A properly functioning gas cap contributes to the overall efficiency of your vehicle. Here are a few reasons why:
- Environmental Impact: A damaged gas cap can lead to fuel vapor emissions, contributing to air pollution. Fixing it helps reduce your vehicle’s environmental footprint.
- Fuel Economy: A sealed gas cap ensures that fuel vapor does not escape, maintaining optimal fuel pressure and improving fuel economy.
- Preventing Further Damage: Ignoring a faulty gas cap may lead to more significant issues within the fuel system, potentially resulting in costly repairs.
If you have tightened or replaced your gas cap and the check engine light remains on, it may be time to seek professional assistance. A certified mechanic can perform a thorough diagnostic check to identify any underlying issues that may be affecting your vehicle. Ignoring persistent warning lights can lead to more severe problems down the line, so it’s better to be proactive.
In summary, addressing a gas cap issue is a simple yet crucial step in maintaining your vehicle’s performance and efficiency. By ensuring that your gas cap is tight and in good condition, you can often resolve the check engine light issue without further complications. Regular vehicle maintenance, including checking the gas cap, can lead to a smoother and more efficient driving experience.
Faulty Oxygen Sensors
Oxygen sensors play a crucial role in the performance of your vehicle’s engine. These sensors are responsible for monitoring the air-fuel mixture that enters the engine, ensuring optimal combustion and fuel efficiency. When functioning correctly, oxygen sensors help maintain the balance of air and fuel, which is essential for achieving the best performance and minimizing emissions.
However, when oxygen sensors malfunction, they can cause a range of issues that affect your vehicle’s operation. A faulty sensor can lead to an incorrect air-fuel mixture, resulting in poor fuel efficiency and increased emissions. This not only impacts your wallet due to higher fuel costs but can also trigger the check engine light on your dashboard, indicating that something is amiss.
Symptoms of a Faulty Oxygen Sensor
- Decreased Fuel Efficiency: One of the first signs of a failing oxygen sensor is a noticeable drop in fuel economy. If you find yourself visiting the gas station more frequently, it might be time to check your oxygen sensors.
- Rough Engine Idle: A malfunctioning sensor can lead to irregular engine performance, causing the engine to run roughly or stall.
- Increased Emissions: A faulty oxygen sensor can cause your vehicle to emit more pollutants, which may lead to failed emissions tests.
- Check Engine Light Activation: As mentioned earlier, a malfunctioning sensor will likely trigger the check engine light, signaling the need for immediate attention.
How Oxygen Sensors Work
Oxygen sensors work by measuring the amount of oxygen in the exhaust gases as they exit the engine. This data is sent to the vehicle’s engine control unit (ECU), which adjusts the air-fuel mixture accordingly. There are typically two types of oxygen sensors: upstream (pre-catalytic converter) and downstream (post-catalytic converter). The upstream sensor is primarily responsible for fuel mixture adjustments, while the downstream sensor monitors the efficiency of the catalytic converter.
Common Causes of Oxygen Sensor Failure
Several factors can contribute to the failure of oxygen sensors:
- Contamination: Oil, coolant, or fuel leaks can contaminate the sensor, leading to inaccurate readings.
- Age: Like all components, oxygen sensors have a lifespan. Over time, they can wear out and become less effective.
- Electrical Issues: Problems with wiring or connectors can disrupt the sensor’s functionality.
Replacing a Faulty Oxygen Sensor
If you suspect that your oxygen sensor is faulty, it is essential to address the issue promptly. Replacing an oxygen sensor is a relatively straightforward process that can often be done at home with basic tools. Here’s a quick guide:
1. Locate the oxygen sensor (usually near the exhaust manifold).2. Disconnect the electrical connector.3. Unscrew the old sensor using a wrench.4. Install the new sensor and reconnect the electrical connector.5. Reset the check engine light using an OBD-II scanner.
In summary, maintaining the health of your oxygen sensors is vital for ensuring optimal vehicle performance and efficiency. Regular inspections and timely replacements can prevent more significant issues down the line, keeping your vehicle running smoothly and reducing harmful emissions.

Using an OBD-II Scanner to Diagnose Issues
When it comes to diagnosing vehicle issues, utilizing an OBD-II scanner is an essential step for any car owner or mechanic. This tool provides invaluable insights into the health of your vehicle by reading diagnostic trouble codes (DTCs) stored in the vehicle’s onboard computer system. These codes are generated when the vehicle’s sensors detect an issue, which can range from minor to severe problems, ultimately leading to the activation of the check engine light.
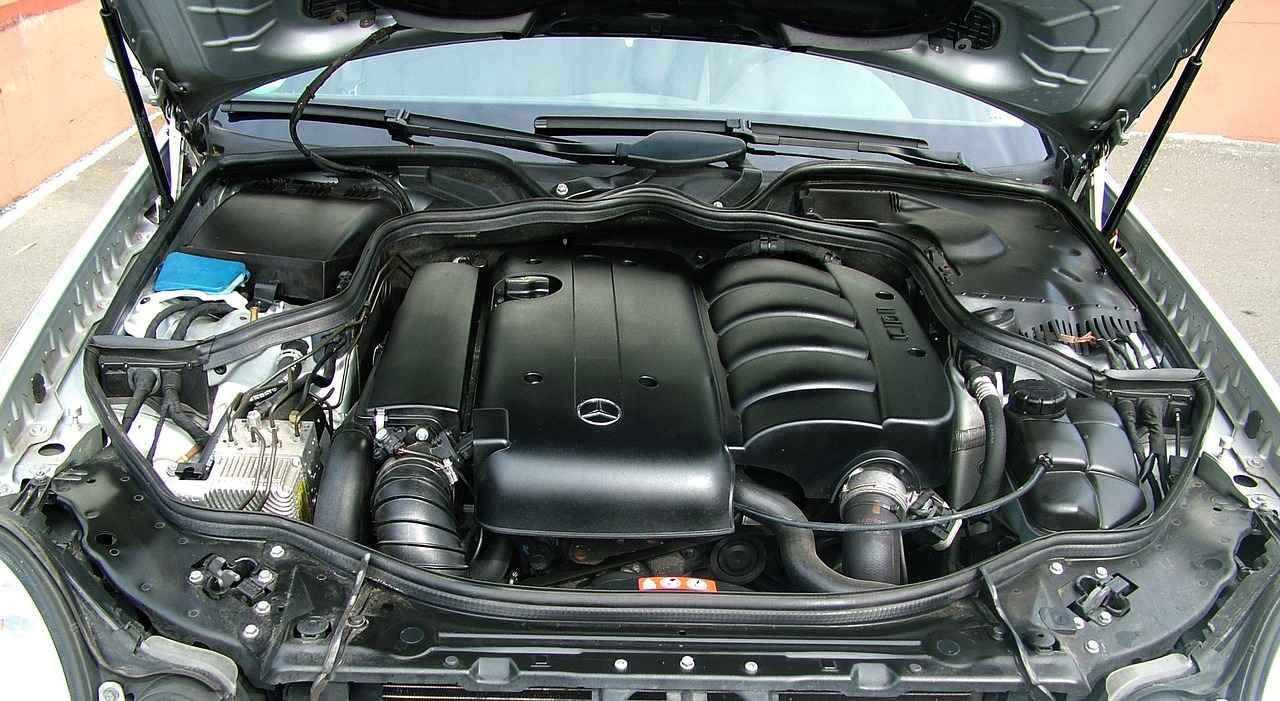
An OBD-II scanner is a device that connects to the OBD-II port of your vehicle, typically located under the dashboard. This port allows the scanner to communicate with the vehicle’s computer, retrieving data related to its performance and diagnostics. By using an OBD-II scanner, you can quickly identify the reason behind the illumination of the check engine light, saving time and money on unnecessary repairs.
- Locate the OBD-II Port: First, find the OBD-II port in your vehicle. It’s usually situated beneath the steering column or near the driver’s seat.
- Connect the Scanner: Plug the scanner into the port securely.
- Turn On the Ignition: With the scanner connected, turn the vehicle’s ignition to the ‘on’ position without starting the engine.
- Read the Codes: Follow the scanner’s instructions to retrieve the DTCs. Each code corresponds to a specific issue, which you can reference in the scanner’s manual or online databases.
Once you have the DTCs, understanding them is crucial. Each code consists of a letter followed by four digits, indicating the type of issue and its location. For example, a code starting with ‘P’ signifies a powertrain issue, while ‘B’ indicates a body issue. By interpreting these codes, you can determine whether the problem is something that can be fixed easily, like a loose gas cap, or something that may require professional assistance.
| Code | Description |
|---|---|
| P0101 | Mass Air Flow (MAF) Circuit Range/Performance Problem |
| P0420 | Catalytic Converter Efficiency Below Threshold |
| P0300 | Random/Multiple Cylinder Misfire Detected |
| P0455 | Evaporative Emission Control System Leak Detected (Large Leak) |
Using an OBD-II scanner offers several advantages:
- Cost-Effective: Identifying issues early can prevent costly repairs down the line.
- Time-Saving: Quickly diagnose problems without the need for extensive manual inspection.
- Enhanced Vehicle Knowledge: Gain insights into your vehicle’s performance and health.
After resolving the issue indicated by the DTCs, you may need to reset the check engine light. This can often be done with the OBD-II scanner by selecting the option to clear the codes. Alternatively, disconnecting the vehicle’s battery for a few minutes can also reset the system. However, be cautious as this may affect other electronic settings in the vehicle.
In conclusion, an OBD-II scanner is a powerful tool for diagnosing vehicle issues efficiently. By understanding how to use it and interpreting the codes, you can take proactive steps to maintain your vehicle’s health and avoid unnecessary expenses.
How to Use an OBD-II Scanner
Using an OBD-II scanner is a simple yet effective way to diagnose issues with your vehicle. This device connects to your car’s onboard diagnostic system, allowing you to access valuable information about its performance and any potential problems. Here’s a comprehensive guide on how to use an OBD-II scanner effectively.
- Locate the OBD-II Port: The first step is to find the OBD-II port in your vehicle. This port is typically located beneath the dashboard, near the steering column. In some vehicles, it may be found near the driver’s side door or under the center console.
- Turn on the Ignition: Once you have located the OBD-II port, plug the scanner into the port securely. After that, turn on the vehicle’s ignition. You don’t necessarily need to start the engine; just turning the key to the “ON” position is sufficient.
- Power Up the Scanner: Most OBD-II scanners will power on automatically once connected. If it doesn’t, check the connections and ensure the scanner is functioning properly. Some scanners may require you to press a power button.
- Access the Diagnostic Codes: Follow the prompts on the scanner’s display to navigate through the menu options. Select the option to read diagnostic trouble codes (DTCs). The scanner will communicate with your vehicle’s computer and retrieve any stored codes.
- Interpret the Codes: Once the codes are displayed, refer to the user manual or an online database to understand what each code means. Codes typically start with a letter followed by four digits (e.g., P0420). These codes can indicate everything from minor issues to serious engine problems.
- Document the Findings: Make a note of any codes retrieved. This documentation will be useful for further research or when consulting with a mechanic.
- Clear the Codes: If you’ve resolved the issue, you can clear the codes using the scanner. This will turn off the check engine light and reset the vehicle’s computer. Follow the instructions on your scanner to complete this step.
- Cost-Effective: Using an OBD-II scanner can save you money on unnecessary mechanic visits. Many minor issues can be diagnosed and resolved at home.
- Time-Saving: Quickly identifying problems helps you address issues before they escalate, reducing the time spent on repairs.
- Empowers Vehicle Owners: Understanding your vehicle’s diagnostic codes gives you more control over its maintenance and performance.
An OBD-II scanner can help identify a variety of issues, including:
- Engine Misfires: This can lead to reduced fuel efficiency and increased emissions.
- Oxygen Sensor Failures: A malfunctioning sensor can affect fuel management and emissions control.
- Exhaust System Problems: Issues with the catalytic converter can trigger warning lights.
In summary, using an OBD-II scanner is a valuable skill for any vehicle owner. Not only does it help you understand your vehicle better, but it also allows you to take proactive steps in maintaining its health. With a little practice, you can quickly become proficient in diagnosing and resolving common vehicle issues.
Interpreting Diagnostic Trouble Codes
is a crucial step in understanding your vehicle’s health. Each Diagnostic Trouble Code (DTC) corresponds to a specific problem within your vehicle’s systems. By interpreting these codes accurately, you can determine whether a simple fix is possible or if professional assistance is required. This knowledge empowers vehicle owners to make informed decisions regarding maintenance and repairs.
When your check engine light illuminates, it is accompanied by a DTC that is stored in your vehicle’s onboard computer. These codes are standardized across various manufacturers, making it easier for technicians and car owners alike to identify issues. The codes typically consist of a letter followed by four digits, such as P0420 or P0131. The letter indicates the system affected, while the numbers provide specific information about the malfunction.
- P Codes: These codes relate to the powertrain, which includes the engine and transmission.
- B Codes: These codes pertain to body systems, such as airbags and seat belts.
- C Codes: These codes are related to chassis systems, including brakes and suspension.
- U Codes: These codes indicate network issues, often indicating communication problems between modules.
Understanding the meaning behind each DTC is essential. For example, a code like P0301 indicates a misfire in cylinder one, while P0171 suggests a system too lean condition. By knowing what these codes signify, you can assess whether the issue is something you can address yourself or if it necessitates a trip to the mechanic.
For many common codes, such as those related to a loose gas cap or faulty oxygen sensors, DIY solutions may be readily available. However, more complex codes, such as those indicating engine misfires or transmission failures, may require professional diagnostic tools and expertise to resolve. This differentiation is vital, as attempting to fix a complex issue without proper knowledge can lead to further damage and increased repair costs.
Moreover, the context surrounding the DTC is equally important. Factors such as the vehicle’s make and model, as well as any accompanying symptoms, can provide additional clues. For instance, if a DTC is triggered alongside unusual noises or performance changes, it may indicate a more serious underlying problem.
To interpret DTCs effectively, consider using an OBD-II scanner. This device connects to your vehicle’s OBD-II port and retrieves the codes stored in the computer. Many scanners also offer a description of the codes, which can be helpful for understanding the issue at hand. Once you have the codes, you can consult reliable online databases or repair manuals for detailed explanations and potential solutions.
In conclusion, interpreting diagnostic trouble codes is a valuable skill for any vehicle owner. By understanding what these codes mean, you can make informed decisions about repairs and maintenance. Whether you choose to tackle the issue yourself or seek professional help, being knowledgeable about DTCs can save you time and money in the long run.

Resetting the Check Engine Light
When it comes to vehicle maintenance, one of the most common concerns for car owners is the check engine light (CEL). This warning indicator can illuminate for a variety of reasons, and once the underlying issue has been addressed, it’s essential to understand how to reset the light. Below, we will explore effective methods to reset the check engine light, enabling you to ensure your vehicle is running optimally.
The check engine light serves as a crucial alert for potential problems with your vehicle’s engine or emissions control systems. After diagnosing and fixing the underlying issue, it is equally important to reset this light to clear any stored diagnostic trouble codes (DTCs) in the vehicle’s computer. This action not only provides peace of mind but also allows you to monitor your vehicle’s performance without the distraction of an illuminated warning light.
- Using an OBD-II Scanner
- Disconnecting the Battery
- Ignition Cycle Reset
One of the most efficient ways to reset the check engine light is by utilizing an OBD-II scanner. This tool connects to your vehicle’s OBD-II port, typically located under the dashboard. Here’s how to use it:
- Plug the OBD-II scanner into the port.
- Turn on the vehicle’s ignition without starting the engine.
- Follow the scanner’s instructions to read and clear the DTCs.
Clearing the codes will turn off the check engine light, provided the underlying issue has been resolved.
Another method to reset the check engine light involves disconnecting the vehicle’s battery. This process can effectively reset the vehicle’s computer and clear the stored codes. To do this:
- Turn off the vehicle and open the hood.
- Disconnect the negative terminal of the battery.
- Wait for approximately 15 minutes.
- Reconnect the negative terminal and start the vehicle.
While this method is straightforward, it may also reset other electronic systems in your vehicle, such as radio presets and clock settings.
For some vehicles, an ignition cycle reset can also turn off the check engine light. This method is less common but worth trying if you prefer not to use tools. To perform this reset:
- Turn the ignition key to the “On” position without starting the engine.
- Wait for about 10 seconds.
- Turn the key to the “Off” position.
- Repeat this process three times, ending with the key in the “On” position.
This may reset the CEL if the underlying issue is resolved.
If the check engine light remains illuminated after attempting these reset methods, it may indicate a more serious issue that requires professional diagnosis and repair. Ignoring persistent warning lights can lead to more significant problems down the line, so it’s vital to consult a qualified mechanic if necessary.
In summary, resetting the check engine light is an important step in maintaining your vehicle after addressing any underlying issues. Whether using an OBD-II scanner, disconnecting the battery, or attempting an ignition cycle reset, these methods can help you turn off the warning light and keep your vehicle running smoothly.
Resetting with an OBD-II Scanner
Resetting the check engine light is a crucial step in vehicle maintenance, especially after addressing any underlying issues. One of the most effective methods to accomplish this is by using an OBD-II scanner. This handy device not only helps in diagnosing problems but also plays a significant role in resetting the vehicle’s computer systems.
After you have identified and resolved the issue causing the check engine light to illuminate, the next step is to clear the diagnostic trouble codes (DTCs) stored in your vehicle’s onboard computer. This is where the OBD-II scanner comes into play.
- Locate the OBD-II Port: The OBD-II port is usually found under the dashboard near the driver’s seat. It may be covered, so look for a small panel that can be easily removed.
- Connect the Scanner: Plug the OBD-II scanner into the port securely. Ensure that your vehicle is turned off during this step.
- Turn on the Ignition: Start your vehicle or turn the ignition to the ‘on’ position without starting the engine. This powers the scanner.
- Access the Codes: Follow the scanner’s instructions to navigate through the menu. Select the option to read or view stored codes.
- Clear the Codes: Once you have reviewed the codes and confirmed that the issues are resolved, select the option to clear or reset the codes. This will turn off the check engine light.
Utilizing an OBD-II scanner for resetting the check engine light offers several advantages:
- Quick Diagnosis: The scanner provides immediate access to the specific codes, allowing for quick identification of issues.
- Cost-Effective: Instead of visiting a mechanic for a simple reset, you can save time and money by using your own scanner.
- Enhanced Vehicle Knowledge: Regular use of an OBD-II scanner can help you understand your vehicle’s performance and maintenance needs better.
Many vehicle owners believe that simply resetting the check engine light will solve the problem. However, it’s essential to understand that:
- Resetting Doesn’t Fix Issues: Clearing the codes will turn off the light, but if the underlying problem persists, the light will likely come back on.
- Temporary Solution: Resetting the light is a temporary measure. You must address the root cause to prevent future occurrences.
In conclusion, using an OBD-II scanner is an effective method for resetting the check engine light after resolving any issues. This tool not only aids in diagnosing problems but also empowers vehicle owners to take control of their maintenance needs. By following the steps outlined above, you can ensure that your vehicle’s systems are functioning correctly and that the check engine light remains off.
Resetting by Disconnecting the Battery
When it comes to maintaining your vehicle, understanding how to reset the check engine light is an essential skill. One of the methods you might consider is disconnecting the battery. This process can be a quick and effective way to reset your vehicle’s computer system, which may turn off the check engine light. However, it is important to be aware of the potential consequences of this action.
Disconnecting the battery essentially cuts off power to the vehicle’s electrical systems. This can help in resetting the engine control unit (ECU) and clearing any temporary faults that may have triggered the check engine light. When you reconnect the battery, the ECU will perform a self-check and may turn off the light if it no longer detects any issues.
- Turn Off the Ignition: Ensure your vehicle is completely off before starting.
- Locate the Battery: Open the hood and find the battery, usually located at the front of the engine bay.
- Disconnect the Negative Terminal: Use a wrench to loosen the nut on the negative terminal (typically marked with a minus sign). Remove the cable and set it aside.
- Wait: Leave the battery disconnected for about 10-15 minutes to allow the ECU to reset.
- Reconnect the Battery: Reattach the negative cable and tighten the nut securely.
While this method can effectively turn off the check engine light, it is crucial to understand that disconnecting the battery may reset other electronic systems in your vehicle. This can include:
- Radio Settings: Your radio presets and settings may be lost.
- Clock Settings: You will need to reset the time on your clock.
- Electronic Stability Control: Some advanced systems may require recalibration.
Additionally, if the underlying issue that caused the check engine light to illuminate is not resolved, the light may turn back on after a short period. Therefore, it is advisable to diagnose the root cause of the problem before resorting to this method.
If you find yourself frequently needing to disconnect the battery to turn off the check engine light, it may be time to consult a professional mechanic. They can perform a thorough diagnostic check using an OBD-II scanner to identify any persistent issues that need addressing. Ignoring these problems can lead to more severe damage and costly repairs down the line.
In summary, while disconnecting the battery can be a quick fix for turning off the check engine light, it is not a substitute for proper vehicle maintenance and diagnostics. Always prioritize understanding the underlying issues to ensure your vehicle remains in optimal condition.

When to Seek Professional Help
When it comes to vehicle maintenance, understanding the check engine light is crucial. While many drivers may attempt to troubleshoot minor issues on their own, there comes a time when professional intervention is necessary. This section will explore the signs that indicate you should seek expert help regarding your vehicle’s check engine light.
Firstly, if the check engine light remains illuminated after you have tried basic troubleshooting methods, it is a clear signal that the issue may be more complex. Ignoring this warning could lead to further damage and costly repairs down the line. Here are some key indicators that it is time to consult a professional:
- Persistent Warning Light: If the light does not turn off after addressing potential issues like a loose gas cap or replacing faulty spark plugs, it’s time to seek help.
- Strange Noises: Unusual sounds coming from the engine, such as knocking or grinding, can indicate serious problems like engine misfires or mechanical failures.
- Decreased Performance: A noticeable drop in acceleration, power, or fuel efficiency can suggest underlying issues that require a professional diagnosis.
- Unusual Smells: If you detect burning smells or other strong odors, it may signal engine overheating or fuel leaks, which should be addressed immediately.
- Visible Smoke: Any smoke emitting from the exhaust or the engine itself is a serious concern and warrants immediate professional evaluation.
Moreover, understanding the diagnostic trouble codes (DTCs) can provide valuable insights into the potential issues. While an OBD-II scanner can help identify these codes, interpreting them often requires specialized knowledge. A professional mechanic can accurately diagnose the problem and recommend appropriate solutions.
Another reason to seek professional help is if you lack the tools or experience necessary to perform more complex repairs. Some issues, such as those related to the transmission or engine internals, may require advanced diagnostic equipment and expertise that only a certified mechanic possesses.
In addition, if your vehicle is still under warranty, it’s advisable to consult a professional rather than attempting repairs on your own. Unauthorized repairs can void your warranty, leaving you responsible for future costs.
Finally, regular maintenance checks can help prevent the check engine light from becoming a recurring issue. Professionals can perform comprehensive system checks, ensuring all components are functioning optimally and addressing any potential problems before they escalate.
In summary, while some issues triggering the check engine light can be resolved with simple DIY fixes, it is essential to recognize when to seek professional help. Ignoring persistent warning signs can lead to more severe problems, ultimately costing you more in repairs. By staying informed and proactive about your vehicle’s health, you can ensure its longevity and reliability.
Frequently Asked Questions
- What does the check engine light mean?
The check engine light (CEL) is your car’s way of telling you that something isn’t quite right under the hood. It could be a minor issue like a loose gas cap or something more serious like engine problems. Ignoring it could lead to bigger headaches down the road!
- How can I turn off the check engine light?
To turn off the check engine light, first, identify and resolve the issue causing it. Common fixes include tightening or replacing a faulty gas cap. After addressing the problem, you can use an OBD-II scanner to reset the light, or simply disconnect the battery for a few minutes.
- When should I seek professional help for my check engine light?
If the check engine light stays on even after you’ve tried basic fixes, it’s time to call in the pros. Persistent lights can indicate more serious issues that require specialized diagnostic tools and expertise to resolve.
- Can I use an OBD-II scanner myself?
Absolutely! Using an OBD-II scanner is simple. Just plug it into your car’s OBD-II port, turn on the ignition, and read the codes. This will help you understand what’s going on and whether you can fix it yourself or need assistance.


