This article provides a detailed guide on how to turn off the water supply at 3822 Blossom Terrace, Erie, PA. By following these steps, you can ensure effective management of your water supply, especially during emergencies.
Understanding Your Water Supply System
Before you turn off the water, it is crucial to understand your home’s water supply system. Familiarizing yourself with the main shutoff valve’s location and function can help prevent water damage during unforeseen events. Knowing how your plumbing works will empower you to act swiftly when needed.
Locating the Main Water Shutoff Valve
Identifying the main water shutoff valve is essential for any homeowner. Common locations include:
- Basements: Often the most typical location.
- Crawl Spaces: Check under the house if applicable.
- Exterior: Near the foundation for homes without basements.
Basement Shutoff Valve
In many homes, the main shutoff valve is located in the basement. To find it quickly:
- Look near the front or back walls, close to where the water line enters the house.
- Ensure the area is well-lit and accessible.
Checking for Valve Accessibility
Ensure that the area around the valve is clear of obstructions. This is vital for quick access during plumbing emergencies.
Identifying Valve Types
Understanding the different types of shutoff valves, such as ball valves and gate valves, is important for knowing how to operate them effectively. Ball valves typically require a quarter turn to close, while gate valves need to be turned several times.
Exterior Shutoff Valve
If your home lacks a basement, the main shutoff valve may be located outside. Look for it near the foundation, often in a pit or box that may require a cover to be removed.
How to Turn Off the Water Supply
Once you locate the shutoff valve, follow these steps to turn it off:
- Turn the valve clockwise until it stops.
- For gate valves, turn it until you feel resistance.
Ensuring the Water is Fully Off
After turning off the valve, check that the water supply is completely shut off. Open a faucet at the highest point in your home to allow air in and confirm that no water is flowing.
What to Do If the Valve is Stuck
Sometimes, valves can become stuck due to corrosion or lack of use. Here are some tips to handle a stuck valve:
- Using Lubricants Safely: Apply a suitable lubricant to the valve threads to help it turn.
- When to Call a Professional: If you cannot turn off the valve despite your efforts, it may be time to call a plumbing professional.
Emergency Situations and Water Shutoff
In emergencies, knowing how to quickly shut off the water can prevent significant damage. Common scenarios include:
- Dealing with Burst Pipes: Act quickly to shut off the water and minimize damage.
- Flooding and Water Damage Prevention: Regular maintenance of shutoff valves can help prevent flooding.
Post-Shutoff Procedures
After successfully turning off the water, there are important steps to take:
- Draining the System: This can help prevent freezing in winter. Open all faucets to drain water from the pipes.
- Checking for Leaks: Inspect for leaks in fixtures and pipes to ensure everything is secure before restoring the water supply.

Understanding Your Water Supply System
Understanding your home’s water supply system is crucial for effective maintenance and emergency preparedness. Before you turn off the water, it’s important to familiarize yourself with the components of this system, particularly the main shutoff valve. This valve plays a vital role in controlling the water flow throughout your home and can be a lifesaver during plumbing emergencies.
The main shutoff valve is typically located near where the water line enters your home. Knowing its location allows you to act swiftly in the event of a leak or burst pipe, helping to prevent extensive water damage. In most cases, this valve is situated in a basement, crawl space, or even outside near the foundation. Familiarizing yourself with these locations can save precious time during emergencies.
Understanding the function of the main shutoff valve is equally important. This valve is designed to stop the flow of water into your home, effectively isolating your plumbing system from the municipal supply. In emergencies such as flooding or significant leaks, shutting off this valve can prevent further damage and allow you to manage the situation more effectively.
To locate the main shutoff valve, start by checking common areas:
- Basements: Many homes have their main shutoff valve in the basement. Look for a valve on the pipe that brings water into your home.
- Crawl Spaces: If your home has a crawl space, the valve may be located there, often near the front of the house.
- Exterior Locations: For homes without basements, the shutoff valve may be found outside, typically close to the foundation wall.
Once you locate the valve, ensure it is easily accessible. Clear any obstructions around it to facilitate quick access during emergencies. Additionally, familiarize yourself with the type of valve you have—whether it’s a ball valve or a gate valve—as this knowledge will help you operate it effectively.
In summary, understanding your water supply system and the main shutoff valve’s function is essential for any homeowner. This knowledge not only empowers you to handle emergencies but also aids in the overall maintenance of your plumbing system. Regularly checking the valve and ensuring it is in working order can save you from potential disasters and costly repairs.

Locating the Main Water Shutoff Valve
Understanding the location of your main water shutoff valve is essential for every homeowner. In emergency situations, knowing where this valve is located can save you from extensive water damage and costly repairs. This section will guide you through the common locations of the valve in residential properties, ensuring you are well-prepared to manage your water supply effectively.
The main water shutoff valve can typically be found in a few key areas of your home. Here are the most common locations:
- Basements: For homes with basements, the main shutoff valve is often located near the front foundation wall. It is usually close to where the water line enters the home. This area should be easily accessible, so ensure that it is free of clutter.
- Crawl Spaces: In homes without basements, the shutoff valve may be situated in a crawl space. This location can be harder to access, so it’s important to familiarize yourself with the area and ensure it is well-lit and clear of debris.
- Outside the Home: Many houses have their main shutoff valve located outside, typically near the foundation or along an exterior wall. Look for a small valve or a round cover in the ground; it may be buried under dirt or landscaping.
- Utility Rooms: Some homes have the shutoff valve in a utility room, often near the water heater or washing machine. This location can be convenient for quick access during emergencies.
Identifying the main water shutoff valve can sometimes be a challenge. Here are some tips to help you locate it:
- Check Your Home’s Blueprints: If you have access to your home’s blueprints or plumbing diagrams, these documents can provide valuable insights into where the shutoff valve is located.
- Look for Markings: Some valves are marked with a label indicating their function. Look for signs or labels that may help identify the valve as the main shutoff.
- Ask a Professional: If you are unable to locate the valve yourself, consider consulting a plumber. They can quickly identify its location and ensure you know how to operate it.
Once you locate the main shutoff valve, it’s important to understand the type of valve you are dealing with. Common types include:
- Ball Valves: These valves are typically round and require a quarter turn to open or close. They are known for their durability and reliability.
- Gate Valves: These valves have a wheel-like handle and are turned to open or close. They may take more time to operate compared to ball valves.
Familiarizing yourself with these details will ensure you are prepared to act quickly in case of an emergency. Remember, regular maintenance and checks of your shutoff valve can prevent potential issues in the future.
Basement Shutoff Valve
In many households, the main shutoff valve is a critical component of the plumbing system, often located in the basement. Understanding how to quickly locate and access this valve is essential for homeowners, especially in emergency situations. This section provides valuable tips to help you find the valve efficiently and ensure it remains accessible when you need it the most.
The main shutoff valve is responsible for controlling the flow of water into your home. If a plumbing emergency arises, such as a burst pipe or significant leak, being able to swiftly turn off the water supply can prevent extensive damage. Therefore, knowing the exact location of the valve is crucial.
- Look for Common Indicators: In many homes, the main shutoff valve is typically found near the front of the house, where the water line enters from the street. If you have a basement, check the walls and corners for pipes that lead to the main water supply.
- Clear the Area: Ensure that the area surrounding the valve is free of clutter. This will make it easier to access the valve quickly during emergencies. Consider organizing the space and removing any obstructions that could hinder your access.
- Check for Labels: Some homeowners label their shutoff valves for easy identification. Look for any markings or tags that may indicate the location of the valve.
Once you have located the valve, it’s important to familiarize yourself with its operation. There are two common types of shutoff valves:
1. Ball Valves: These valves have a lever handle that you turn a quarter turn to shut off the water.2. Gate Valves: These valves require you to turn the handle multiple times to close the valve fully.
Understanding the type of valve you have will help you operate it effectively. If you are unsure, consult a plumbing professional for assistance.
Another important aspect is to regularly check the functionality of your shutoff valve. Over time, valves can become corroded or stuck due to lack of use. To prevent this, it is recommended to turn the valve off and on periodically to ensure it remains functional. If you encounter resistance when trying to operate the valve, do not force it. Instead, consider applying a suitable lubricant to help ease its movement.
In summary, knowing how to quickly locate and access your basement shutoff valve is essential for every homeowner. By following these tips and maintaining a clear path to the valve, you can ensure that you are prepared for any plumbing emergencies that may arise.
Checking for Valve Accessibility
When it comes to maintaining your plumbing system, ensuring that the area around the valve is clear of obstructions is a critical step. This precaution is particularly important for quick accessibility during emergencies. In this section, we will explore the significance of keeping the valve area unobstructed, practical tips for maintaining accessibility, and the potential consequences of neglecting this vital aspect.
Importance of Accessibility
During a plumbing emergency, every second counts. If the main shutoff valve is blocked by furniture, boxes, or other items, it can significantly delay your response time. This can lead to increased water damage and costly repairs. By maintaining a clear pathway to the valve, you ensure that you can act swiftly when necessary, minimizing potential damage to your home.
Practical Tips for Keeping the Valve Area Clear
- Regular Inspection: Schedule routine checks of the area around your shutoff valve. This helps identify any new obstructions that may have accumulated over time.
- Organize Storage: If the valve is located in a basement or utility room, consider organizing that space to keep it clutter-free. Use shelves or storage bins to store items away from the valve.
- Signage: If necessary, place a visible sign near the valve area to remind household members to keep it clear. This can be particularly helpful in busy family homes.
Potential Consequences of Obstruction
Failing to keep the area around your shutoff valve clear can lead to a variety of issues:
- Delayed Response: In emergencies, every moment matters. An obstructed valve can lead to delays that exacerbate water damage.
- Increased Repair Costs: If water damage occurs due to delayed access to the valve, the costs for repairs can escalate quickly.
- Safety Hazards: Clutter around the valve can create tripping hazards, especially in low-light situations during emergencies.
Conclusion
In summary, ensuring that the area around your main shutoff valve is free from obstructions is not just a matter of convenience; it is a crucial aspect of home safety and maintenance. By taking proactive steps to maintain accessibility, you can protect your home from water damage and ensure peace of mind during plumbing emergencies.
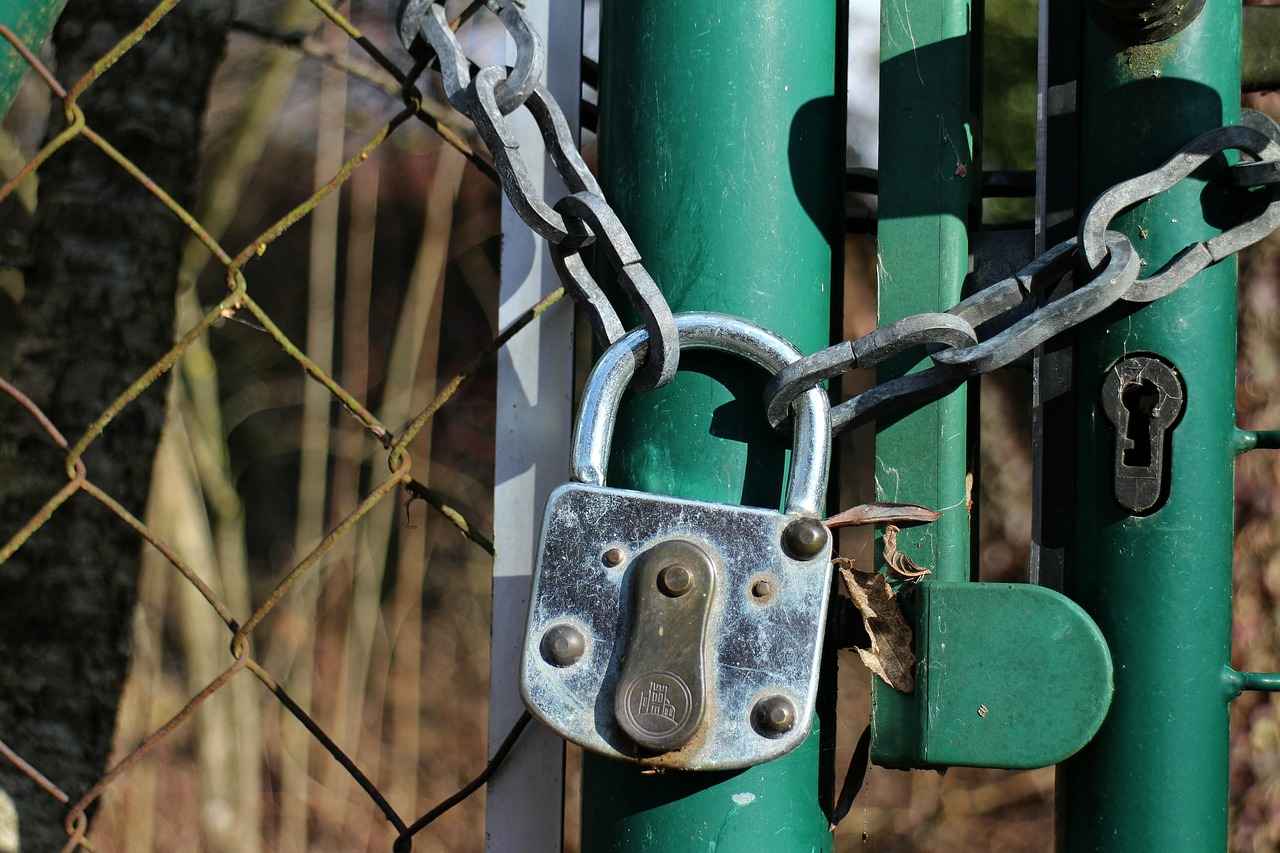
Identifying Valve Types
When it comes to managing your home’s plumbing system, understanding the various types of shutoff valves is crucial. Different valves serve distinct purposes and operate in unique ways, making it essential to know how to identify and operate them effectively. This knowledge will empower homeowners to handle plumbing issues more proficiently and prevent potential water damage.
Types of Shutoff Valves
- Ball Valves: These valves feature a spherical disc that controls the flow of water. When the handle is turned, the ball rotates to either allow or block water flow. Ball valves are known for their durability and ability to provide a tight seal, making them ideal for quick shutoff applications.
- Gate Valves: Unlike ball valves, gate valves use a wedge-shaped gate to control water flow. The gate is raised or lowered to open or close the valve. While gate valves are effective for full on/off applications, they are not recommended for throttling flow, as doing so can lead to wear and tear.
- Globe Valves: These valves are designed for regulating flow rather than just shutting it off. They have a spherical body and an internal baffle that allows for precise control over the flow rate. Globe valves are often used in applications where flow regulation is necessary.
- Compression Valves: Commonly found in residential plumbing, compression valves utilize a rubber washer that compresses against a seat to stop the flow of water. They are typically used for sink and faucet shutoffs.
Understanding these valve types not only aids in identifying them but also in knowing how to operate them when necessary. For instance, when dealing with a ball valve, turning the handle a quarter turn is usually sufficient to shut off the water. In contrast, a gate valve may require several turns to close fully.
Importance of Valve Maintenance
Regular maintenance of shutoff valves is essential to ensure they function correctly when needed. Valves can become corroded or stuck over time, making them difficult to operate. It is advisable to periodically check the valves, ensuring they are easily accessible and free from obstructions. If a valve feels stuck, applying a lubricant can often help restore its function.
When to Seek Professional Help
In some instances, homeowners may find that they are unable to turn off a valve due to its condition. If you encounter a valve that is stuck or damaged, it is wise to consult a plumbing professional. Attempting to force a valve can lead to further damage and costly repairs.
In summary, being knowledgeable about the different types of shutoff valves, such as ball valves and gate valves, is vital for effective plumbing management. This understanding not only helps in operating these valves correctly but also aids in maintaining them, ensuring a reliable water supply system in your home.
Exterior Shutoff Valve
When it comes to managing your home’s water supply, understanding the location and operation of the main shutoff valve is essential. For many homeowners, especially those without basements, the main shutoff valve is typically found outside. This section will guide you through the process of locating and accessing exterior shutoff valves, which are often situated near the foundation of the house.
To locate your exterior shutoff valve, start by inspecting the perimeter of your home. Look for a metal or plastic cover that may be flush with the ground or slightly raised. These covers often indicate the presence of a shutoff valve. In some cases, the valve may be housed in a small pit or box, which is designed to protect it from the elements.
- Near the Foundation: Most commonly, you will find the shutoff valve close to the foundation wall, typically on the side of the house facing the street.
- In a Utility Box: Some homes have a utility box that contains the shutoff valve, which may also house other utility connections.
- Adjacent to Exterior Hose Bibs: If your home has outdoor faucets, the shutoff valve may be located nearby, as these fixtures often connect directly to the main water supply.
Once you have identified the location of your exterior shutoff valve, it’s important to ensure that the area is clear of debris and obstructions. Remove any plants, dirt, or other items that may be blocking access to the valve. This will not only help you reach the valve quickly in an emergency but also prevent damage to the valve itself.
Exterior shutoff valves can vary in design. The most common types are ball valves and gate valves. A ball valve typically has a lever that you turn 90 degrees to shut off the water, while a gate valve requires you to turn a handle clockwise to close it. Familiarizing yourself with the type of valve you have will ensure you can operate it effectively when needed.
It is advisable to check your exterior shutoff valve regularly, especially before the winter months. Inspect for any signs of corrosion or wear, and ensure that the valve operates smoothly. If you notice any issues, consider applying a lubricant or contacting a professional for assistance.
If you are unable to locate your exterior shutoff valve, it’s crucial to consult your home’s plumbing plans or contact a local plumber. They can provide guidance based on your home’s specific layout and plumbing system.
In the event of a plumbing emergency, such as a burst pipe or significant leak, knowing how to quickly access your exterior shutoff valve can prevent extensive water damage. Make it a habit to periodically check the valve’s accessibility and functionality, ensuring you are prepared for any urgent situations.
By understanding the importance of your and knowing how to locate and operate it, you can take proactive steps to manage your home’s water supply effectively. This knowledge not only empowers you as a homeowner but also helps protect your property from potential water damage.

How to Turn Off the Water Supply
When faced with a plumbing issue or preparing for maintenance, knowing how to turn off the water supply is a critical skill for any homeowner. This guide will provide you with step-by-step instructions to ensure a complete and effective shutoff of your water supply at 3822 Blossom Terrace, Erie, PA.
The shutoff valve is a crucial component of your home’s plumbing system. It controls the flow of water into your home and is typically located near the water meter or where the main water line enters the house. Familiarizing yourself with its location and function can save you time and prevent potential water damage during emergencies.
To effectively turn off the water supply, first, you must locate the main shutoff valve. Common locations include:
- Basements: Often found near the front or back wall.
- Crawl Spaces: Check close to the foundation.
- Outside: Look near the foundation or in a utility box.
Once you have located the shutoff valve, follow these steps to turn it off:
- Identify the Type of Valve: Determine whether you have a ball valve (which has a lever) or a gate valve (which requires turning a handle).
- For Ball Valves: Turn the lever 90 degrees until it is perpendicular to the pipe.
- For Gate Valves: Turn the handle clockwise until it stops. Do not force it, as this can cause damage.
After turning off the valve, it is essential to confirm that the water supply is fully shut off. You can do this by:
- Turning on a faucet in your home and checking for any water flow.
- Inspecting the water meter to see if it continues to move.
Valves can sometimes become stuck due to corrosion or lack of use. If you encounter this issue, consider the following:
- Applying Lubricants: Use a penetrating lubricant designed for plumbing, and apply it carefully to avoid overspray.
- Using Tools: If necessary, use a wrench, but be cautious not to apply too much force.
If you are unable to turn off the valve despite your best efforts, it may be time to call in a plumbing professional. They possess the expertise and tools to handle stubborn valves safely.
In emergencies, knowing how to quickly shut off the water can prevent significant damage. Common scenarios include:
- Burst Pipes: If you notice water gushing, immediately shut off the main valve.
- Flooding: Quick action is essential to minimize water damage.
After successfully shutting off the water, follow these steps:
- Drain the System: Open faucets to release any remaining water in the pipes.
- Check for Leaks: Inspect your plumbing fixtures and pipes for any signs of leaks before restoring the water supply.
By following these guidelines, you can effectively manage your water supply and respond to plumbing emergencies with confidence. Remember, being proactive and knowledgeable about your home’s plumbing can save you time, money, and potential damage.
Turning Off Different Types of Valves
Understanding how to properly turn off various types of valves is crucial for any homeowner. This section focuses on two common valve types: ball valves and gate valves. Each valve type has its own mechanism and requires specific techniques for operation. Knowing these differences can help you manage your water supply efficiently, especially during emergencies.
Ball Valves
Ball valves are popular in residential plumbing due to their durability and ease of use. They are designed with a spherical disc that controls the flow of water. To shut off a ball valve:
- Locate the handle, which is typically a lever or a round knob.
- Turn the handle a quarter turn (90 degrees) clockwise. This action positions the ball within the valve to block the water flow.
- Ensure that the handle is perpendicular to the pipe when fully closed; this indicates that the valve is shut off.
Ball valves are known for their quick shutoff capabilities, making them ideal for emergency situations. Regularly check the valve to ensure it operates smoothly and does not become stuck.
Gate Valves
Gate valves operate differently from ball valves and are often used for on/off control. They feature a sliding gate mechanism that lifts to allow water flow. To turn off a gate valve:
- Identify the round wheel or handle at the top of the valve.
- Turn the handle clockwise. Unlike ball valves, gate valves require multiple turns to close completely, usually around 5-7 full rotations.
- Stop turning once you feel resistance; do not force the handle, as this can damage the valve.
It’s important to note that gate valves are not designed for throttling, meaning they should only be fully opened or fully closed. This ensures longevity and prevents damage to the valve.
Common Issues with Valve Operation
Both ball and gate valves can encounter issues over time, such as corrosion or debris buildup. Here are some tips to address common problems:
- Stuck Valves: If a valve is difficult to turn, apply a penetrating lubricant around the handle and allow it to sit for a few minutes before attempting to turn it again.
- Leaking Valves: If you notice water leaking around the valve, it may indicate a need for replacement or repair. Promptly address leaks to avoid water damage.
By understanding the differences between ball and gate valves and knowing how to operate them effectively, you can ensure that your home’s water supply is managed efficiently. Regular maintenance and checks on these valves will help prevent issues and ensure they function properly when needed.
Ensuring the Water is Fully Off
After successfully turning off the valve, it is crucial to ensure that the water supply is completely shut off. This verification process is essential to prevent any potential water damage or flooding that may occur if the valve is not properly closed. In this section, we will explore various methods to confirm that no water is flowing through your pipes.
- Visual Inspection: Begin by checking all faucets in the house. Turn on each faucet, starting from the highest point in your home and working your way down. If no water comes out, it is a good indication that the water supply is indeed off.
- Listen for Water Flow: Pay attention for any sounds of running water. If you hear water flowing, this may indicate that the valve has not fully shut off. Listen closely near the pipes and fixtures to detect any unusual noises.
- Check Water Meter: If your home has a water meter, this can be a reliable tool for verification. After turning off the valve, check the meter reading. If the dial is not moving, it confirms that water is not flowing into your home.
- Monitor Water Pressure: If you have a pressure gauge installed, monitor the pressure readings after shutting off the valve. A stable reading without fluctuations indicates that there is no water entering the system.
- Inspect for Leaks: After turning off the water, inspect all visible pipes and fixtures for any signs of leaks. Look for moisture or water pooling around connections, which could suggest that the valve is not completely sealed.
In addition to these methods, it is advisable to wait a few minutes after shutting off the valve before conducting your checks. This allows any residual water in the pipes to drain out, providing a more accurate assessment of whether the water supply is fully off.
For those who may be uncertain about their ability to verify the shutoff, consider enlisting the help of a professional plumber. They can conduct a thorough inspection and ensure that everything is functioning correctly. Additionally, learning how to properly operate your main shutoff valve and understanding its mechanics can empower you to manage your home’s water supply effectively.
By following these steps, you can have peace of mind knowing that your water supply is completely turned off, protecting your home from potential water-related issues.

What to Do If the Valve is Stuck
When dealing with plumbing issues, encountering a stuck valve can be quite frustrating. A valve may become stuck due to factors such as corrosion, mineral buildup, or simply lack of use. It’s essential to address this issue carefully to avoid any damage to your plumbing system. Here’s a detailed guide on how to effectively handle a stuck valve.
Before attempting to unstick a valve, it’s crucial to assess the situation. Check for any visible signs of damage or corrosion. If the valve appears rusty or corroded, it may require special attention. Ensure that the area around the valve is clear and accessible, as you may need room to maneuver tools or apply lubricants.
One of the most effective methods to free a stuck valve is by applying a suitable lubricant. Here are some tips for using lubricants:
- Choose the Right Lubricant: Use a penetrating oil, such as WD-40 or a silicone-based lubricant. Avoid using heavy oils that can leave a residue.
- Application: Spray the lubricant directly onto the valve’s stem and around the handle. Allow it to penetrate for several minutes.
- Gentle Movement: After the lubricant has soaked in, try gently moving the valve handle back and forth. Avoid using excessive force, as this can damage the valve.
If lubrication doesn’t work, applying heat can help expand the metal and free the valve. Here’s how to do it safely:
- Heat Source: Use a heat gun or a hairdryer to apply heat to the valve. Avoid using an open flame, as this can pose a fire hazard.
- Even Heating: Move the heat source around the valve to ensure even heating. This helps prevent warping or damage.
- Test the Valve: After applying heat for a few minutes, attempt to turn the valve again. If it still doesn’t budge, let it cool down and try lubricating it once more.
If your efforts to unstick the valve are unsuccessful, it may be time to call in a plumbing professional. Here are signs that indicate you should seek help:
- Persistent Stuck Valve: If the valve remains stuck despite lubrication and heat, a professional can assess the situation.
- Visible Damage: If you notice cracks or significant corrosion, it’s safer to have a professional handle the repair or replacement.
- Risk of Water Damage: If you’re concerned about potential leaks or water damage, it’s best to consult with an expert to avoid further complications.
To minimize the risk of valves becoming stuck in the future, consider the following preventive measures:
- Regular Maintenance: Periodically exercise your valves by turning them on and off to keep them functional.
- Inspect for Corrosion: Regularly check for signs of corrosion and address any issues promptly.
- Use Water Softener: If your area has hard water, consider using a water softener to reduce mineral buildup.
By following these steps and tips, you can effectively handle a stuck valve and prevent potential plumbing issues in the future.
Using Lubricants Safely
When dealing with a stuck valve, it’s crucial to approach the situation carefully to avoid causing further damage. Applying a suitable lubricant can often resolve the issue, but not all lubricants are safe for use on plumbing fixtures. This section provides essential insights into which lubricants are effective and safe, along with tips on how to apply them correctly.
Choosing the Right Lubricant
- Silicone-Based Lubricants: These are generally safe for use on plumbing fixtures. They provide a good balance of lubrication and do not leave a residue that could attract dirt or debris.
- Graphite Powder: This dry lubricant is ideal for metal-on-metal applications and won’t gum up like liquid lubricants. It’s especially useful for older valves.
- Penetrating Oils: Products like WD-40 can help loosen stuck parts, but they should be used sparingly and wiped away after application to prevent buildup.
- Avoid Oil-Based Lubricants: Products containing petroleum can degrade rubber seals and washers, leading to leaks and further complications.
How to Apply Lubricants Effectively
- Prepare the Area: Before applying any lubricant, ensure that the area around the valve is clean and free from debris. This will help prevent contamination and ensure that the lubricant can penetrate effectively.
- Apply Sparingly: Use a small amount of the selected lubricant on the valve stem and any moving parts. Avoid over-saturating, as excess lubricant can attract dirt.
- Work the Valve: After application, gently work the valve back and forth. This motion helps the lubricant to penetrate deeper into the mechanism, loosening any stuck components.
- Wipe Away Excess: Once the valve is functioning smoothly, wipe away any excess lubricant to prevent it from collecting dust and grime.
Safety Precautions
- Always wear gloves when handling lubricants to protect your skin from irritation.
- Ensure good ventilation if you are using aerosol lubricants to avoid inhaling fumes.
- Read the product label for specific safety instructions and recommendations.
In summary, using the right lubricant can be an effective way to address a stuck valve. By choosing safe options and applying them correctly, you can restore functionality without risking damage to your plumbing system. If the valve remains stuck after lubrication, it may be time to consider other solutions or consult a plumbing professional for assistance.
When to Call a Professional
When it comes to managing plumbing issues, knowing when to seek professional help is crucial. Many homeowners attempt to tackle minor problems themselves, but there are instances when calling a plumbing expert is the best course of action. This section will provide guidance on identifying those situations and what you can expect during the process.
- Understanding Your Limitations: It’s essential to recognize your own skill level when it comes to plumbing repairs. If you have tried to turn off a valve and it remains stuck despite your best efforts, it might indicate a more significant issue at play. Attempting to force it could lead to further damage.
- Signs of a Bigger Problem: If you notice any signs of leaks, unusual noises from your plumbing, or a sudden increase in your water bill, these may be indicators that you need professional assistance. These signs could point to underlying issues that require specialized tools and knowledge to resolve.
- Emergency Situations: In emergencies such as burst pipes or severe leaks, time is of the essence. If you cannot locate or operate the shutoff valve, calling a plumber immediately can prevent extensive water damage to your property.
When you decide to call a plumbing professional, here’s what you can expect:
- Initial Assessment: The plumber will first assess the situation by asking questions about the problem and inspecting the affected areas. This helps them understand the issue better before proceeding with repairs.
- Expert Recommendations: Based on their assessment, the plumber will provide recommendations on how to address the issue. They may suggest repairs, replacements, or maintenance procedures to prevent future problems.
- Transparent Pricing: A reputable plumber will offer a clear estimate before starting any work, detailing the costs involved. This transparency helps you make informed decisions without any surprises.
- Professional Repairs: Once you approve the plan, the plumber will carry out the necessary repairs or replacements using the right tools and techniques to ensure everything is fixed correctly.
In summary, knowing when to call a professional plumber can save you time, money, and stress. By recognizing your limitations and the signs of a more significant plumbing problem, you can make informed decisions that protect your home and ensure the longevity of your plumbing system.

Emergency Situations and Water Shutoff
In emergency situations, knowing how to quickly turn off the water supply in your home is crucial. This knowledge can save you from extensive water damage and costly repairs. In this section, we will explore common scenarios that necessitate immediate action and provide practical guidance on how to respond effectively.
- Burst Pipes: A burst pipe can lead to a rapid influx of water into your home, potentially causing significant damage to walls, floors, and personal belongings. Recognizing the symptoms of a burst pipe, such as sudden drops in water pressure or visible leaks, is essential for timely action.
- Overflowing Toilets: An overflowing toilet can create a hazardous mess and may lead to water damage if not addressed quickly. Knowing how to turn off the water supply to the toilet can help contain the situation.
- Flooding from Heavy Rain: In areas prone to flooding, heavy rain can overwhelm drainage systems, leading to water entering your home. Knowing where the main shutoff valve is located can prevent further damage during such events.
- Appliance Failures: Appliances such as washing machines and dishwashers can malfunction, causing leaks or floods. Familiarizing yourself with the shutoff valves connected to these appliances can mitigate damage.
When you encounter one of these emergency situations, follow these steps to minimize damage:
- Stay Calm: Panic can lead to poor decision-making. Take a deep breath and assess the situation.
- Locate the Shutoff Valve: Quickly find the main water shutoff valve and any specific shutoff valves for affected appliances.
- Turn Off the Water: Follow the appropriate method for your valve type (ball valve or gate valve) to ensure the water supply is completely shut off.
- Drain Remaining Water: Open faucets to drain any remaining water in the pipes, which can help reduce pressure and minimize further leaks.
- Contact a Professional: If the situation is beyond your control, don’t hesitate to call a plumbing professional for assistance.
Taking proactive steps can significantly reduce the risk of water-related emergencies:
- Regular Inspections: Periodically inspect your plumbing system for signs of wear, leaks, or corrosion. Early detection can prevent emergencies.
- Maintain Shutoff Valves: Ensure that all shutoff valves are functional and easily accessible. Regularly exercise them to prevent sticking.
- Install Water Alarms: Consider installing water alarms in areas prone to leaks. These devices can alert you to issues before they escalate.
- Educate Household Members: Ensure that all family members know how to locate and operate the shutoff valves. This knowledge can be invaluable in an emergency.
By understanding the importance of quickly shutting off the water supply during emergencies and taking preventive measures, you can protect your home from significant water damage. Always be prepared and informed about your plumbing system to ensure the safety and integrity of your living space.
Dealing with Burst Pipes
can be one of the most challenging situations a homeowner faces. Burst pipes not only lead to immediate water loss but can also cause extensive damage to your property, leading to costly repairs and potential health hazards from mold and mildew. Understanding how to respond quickly and effectively is crucial to minimizing damage and ensuring safety.
When you first discover a burst pipe, the first step is to turn off the main water supply. This action prevents further water from flooding your home and helps contain the situation. If you’re unsure how to locate your main shutoff valve, refer to the previous sections of this guide for detailed instructions.
Once the water is turned off, it’s essential to assess the situation. Check the area around the burst pipe for any signs of water pooling. If you notice significant flooding, you may need to take additional steps to mitigate damage:
- Remove Valuables: Quickly move any furniture, electronics, or other valuables away from the affected area to prevent water damage.
- Document the Damage: Take photographs of the affected area for insurance purposes. This documentation can be invaluable when filing a claim.
- Call for Help: If the damage is extensive or you feel overwhelmed, don’t hesitate to call a professional plumber. They can assess the damage and provide the necessary repairs.
In addition to these immediate actions, consider the following practical tips:
- Use Towels and Buckets: Employ towels to soak up excess water and use buckets to collect dripping water. This helps minimize water damage and makes cleanup easier.
- Ventilate the Area: Open windows and doors to allow air circulation. This can help dry out the area and reduce the risk of mold growth.
- Turn Off Electricity: If water is near electrical outlets or devices, turn off the electricity to prevent electrical hazards.
After managing the immediate crisis, it’s important to address the underlying issues that caused the burst pipe. Common causes include:
- Freezing Temperatures: In colder climates, pipes can freeze and burst. Insulating pipes in vulnerable areas can help prevent this.
- Corrosion: Older pipes may corrode over time, leading to weak spots that are prone to bursting. Regular inspections can help identify these issues.
- High Water Pressure: Excessively high water pressure can stress pipes, making them more likely to burst. Installing a pressure regulator can help maintain safe levels.
Finally, once repairs are made, consider implementing proactive measures to prevent future incidents. Regularly inspect your plumbing system, maintain your shutoff valves, and be aware of the signs of potential plumbing issues. By taking these steps, you can protect your home from the devastating effects of burst pipes.
In summary, dealing with burst pipes requires immediate action and a comprehensive understanding of your plumbing system. By turning off the water supply, assessing the damage, and taking proactive measures, you can effectively manage the situation and minimize the risk of future occurrences.
Flooding and Water Damage Prevention
Flooding can cause devastating damage to homes, leading to costly repairs and long-term issues. Therefore, preventing flooding is a crucial responsibility for homeowners. This section outlines various proactive measures that can effectively minimize the risk of water damage, ensuring your home remains safe and secure.
Regular Maintenance of Shutoff Valves
One of the most important steps in preventing flooding is the regular maintenance of shutoff valves. These valves control the flow of water into your home and can be critical during emergencies. Homeowners should periodically check these valves for signs of wear or damage. Ensuring they are operational can prevent water from entering your home in case of a burst pipe or plumbing failure.
Inspecting Gutters and Downspouts
- Ensure gutters are clear of debris to allow proper drainage.
- Check downspouts to make sure they direct water away from the foundation.
- Consider installing gutter guards to reduce the need for frequent cleaning.
Checking Your Home’s Grading
The grading of your property plays a significant role in water management. Ensure that the ground slopes away from your home’s foundation. If you notice pooling water around your foundation, it may be necessary to regrade your yard or install drainage solutions such as French drains to redirect water flow.
Installing a Sump Pump
For homes in flood-prone areas, installing a sump pump can be a lifesaver. This device pumps excess water out of your basement or crawl space, preventing flooding and water damage. Regularly test the sump pump to ensure it is functioning properly, and consider a backup power source to keep it operational during power outages.
Using Flood Barriers
Flood barriers are another effective measure for preventing water intrusion. These can be temporary or permanent solutions that protect entry points to your home, such as doors and windows. Invest in high-quality barriers that can withstand significant water pressure.
Monitoring Weather Conditions
Stay informed about weather conditions in your area. Having a reliable weather app or service can help you prepare for heavy rainfall or storms. If severe weather is predicted, take precautionary measures such as moving valuable items to higher ground and ensuring all drainage systems are clear.
Conducting Regular Inspections
Conduct routine inspections of your plumbing system, including pipes, fixtures, and appliances. Look for signs of leaks, corrosion, or wear that may lead to water damage. Addressing small issues promptly can prevent them from becoming major problems.
Educating Your Family
Finally, educate your family about the importance of water damage prevention. Ensure that everyone knows how to turn off the main water supply in case of an emergency. This knowledge can save valuable time and prevent extensive damage.
By implementing these proactive measures, homeowners can significantly reduce the risk of flooding and water damage. Regular maintenance, effective drainage solutions, and vigilance can protect your home and provide peace of mind.

Post-Shutoff Procedures
After successfully turning off the water supply at your home, it is crucial to follow a series of to ensure the plumbing system is safe and ready for any necessary maintenance or repairs. These steps not only help in preventing potential damage but also assist in preparing the system for future use. Below, we will detail the essential actions to take after shutting off the water.
Draining your plumbing system is an important step, especially in colder climates where water left in the pipes can freeze and cause serious damage. Here’s how to effectively drain your pipes:
- Open Faucets: Start by opening all faucets in your home, including those on lower levels and in the basement, to allow air into the system.
- Flush Toilets: Flush all toilets to empty their tanks and bowls. This will help reduce the remaining water in your plumbing.
- Drain Appliances: If applicable, drain appliances connected to the water supply, such as dishwashers and washing machines, by running them on a short cycle without water.
- Use a Wet/Dry Vacuum: For any residual water, a wet/dry vacuum can be used to remove water from the lowest points in the plumbing system.
Once the water is off and the system is drained, it’s time to check for any potential leaks. This inspection is vital to ensure that your plumbing system is in good condition before turning the water back on:
- Visual Inspection: Examine all visible pipes, joints, and fixtures for any signs of moisture or corrosion.
- Check Under Sinks: Look under sinks and around toilets for any water accumulation or dampness.
- Listen for Drips: In a quiet environment, listen closely for any dripping sounds that may indicate a leak.
- Monitor Water Meter: If you have access to your water meter, take a reading before and after the shutoff. If the meter changes, it may indicate a leak in the system.
After ensuring there are no leaks, assess the condition of the shutoff valves:
- Check for Corrosion: Inspect the valves for any signs of rust or corrosion, which can indicate they may need replacement.
- Test Operation: If the valves have been turned off for a long time, gently test their operation. Ensure they can be turned on and off smoothly.
Before turning the water supply back on, it’s important to prepare your system:
- Close All Faucets: Ensure all faucets are closed to prevent air from entering the system when the water is turned back on.
- Inform Household Members: Let everyone in the household know that the water will be restored soon, to avoid unexpected usage.
By following these , you can ensure that your plumbing system remains in good shape and is ready for use when you turn the water back on. Regular maintenance and inspections are key to preventing future issues and ensuring the longevity of your plumbing system.
Draining the System
When preparing for winter, one crucial step homeowners must take is draining the plumbing system. This process not only helps in avoiding potential water damage but also prevents freezing pipes that can lead to costly repairs. In this section, we will explore the proper steps to drain your pipes effectively after shutting off the water supply.
- Step 1: Turn Off the Main Water Supply
- Step 2: Open All Faucets
- Step 3: Drain Appliances
- Step 4: Flush Toilets
- Step 5: Drain the Water Heater
- Step 6: Use a Wet/Dry Vacuum
- Step 7: Insulate Exposed Pipes
Before you begin draining your plumbing system, ensure that the main water supply is completely turned off. This is typically done at the main shutoff valve, which can be found in the basement, crawl space, or outside the home.
Once the main water supply is off, proceed to open all faucets in your home, starting from the highest level and working your way down. This helps to release any remaining water in the pipes and allows air to enter, facilitating the drainage process.
Don’t forget to drain appliances that use water, such as dishwashers and washing machines. For dishwashers, you can do this by running a short cycle without any dishes. For washing machines, simply detach the hoses and allow any residual water to flow out.
Flush all toilets to remove as much water as possible from the tanks and bowls. After flushing, consider adding a small amount of antifreeze to the toilet bowls to prevent any remaining water from freezing.
If your water heater has a drain valve, open it to let out any water. Be cautious as the water may still be hot. Disconnect the power supply or turn off the gas to the heater before draining.
For thorough drainage, a wet/dry vacuum can be incredibly useful. Use it to suck out any remaining water from the pipes, especially in low-lying areas where water tends to accumulate.
After draining the system, it’s wise to insulate any exposed pipes in unheated areas like basements or attics. Pipe insulation can help protect against freezing temperatures.
By following these steps, you can ensure that your plumbing system is properly drained and protected against freezing during winter months. This proactive approach not only saves you from potential headaches but also contributes to the longevity of your plumbing system.
Remember, if you feel uncertain about any part of this process or if you encounter issues such as stuck valves, it’s always best to consult a professional plumber to avoid causing any damage to your plumbing system.
Checking for Leaks
Once the water supply is turned off, it becomes essential to inspect for leaks throughout your plumbing system. This process is crucial to ensure that all fixtures and pipes are secure and functioning correctly before restoring the water supply. Detecting leaks early can save homeowners from costly repairs and extensive water damage.
In this section, we will explore effective methods for checking for leaks in your home, focusing on both visible signs and hidden issues.
- Visual Inspection of Fixtures: Start by examining all visible plumbing fixtures such as sinks, toilets, and bathtubs. Look for any signs of water pooling around the base or dripping from faucets. Pay close attention to the seals and gaskets, which are common areas for leaks.
- Checking Underneath Sinks: Open the cabinet doors under your sinks and look for any water stains or dampness. If you notice any wet spots, it may indicate a leak in the plumbing connections.
- Inspecting Pipes: Examine exposed pipes in basements, crawl spaces, or utility rooms. Look for any corrosion, rust, or moisture accumulation. If the pipes feel damp to the touch, there may be a leak present.
After conducting a visual inspection, it is advisable to perform a more thorough check using the following methods:
- Water Meter Test: One effective way to check for leaks is by using your water meter. Ensure all water is turned off in your home, then note the reading on your water meter. After a couple of hours, check the reading again. If it has changed, you likely have a leak somewhere in your plumbing system.
- Food Coloring Test for Toilets: Toilets are notorious for silent leaks. Add a few drops of food coloring into the toilet tank. Wait about 30 minutes without flushing. If the color appears in the bowl, you have a leak in the flapper valve.
For areas that are not easily accessible, consider the following:
- Listening for Sounds: Sometimes, you can hear leaks. Listen for any hissing or dripping sounds, especially in walls or ceilings.
- Moisture Detection Tools: Using a moisture meter can help identify hidden leaks behind walls or under floors. These tools can provide an accurate reading of moisture levels, indicating potential leaks.
Once you identify a leak, it is crucial to address it promptly. Depending on the severity, you may be able to perform minor repairs yourself, such as tightening connections or replacing washers. However, for significant leaks or complex plumbing issues, it is advisable to consult a professional plumber.
By taking the time to thoroughly check for leaks after shutting off the water, you can ensure that your home remains safe and dry, preventing future complications and expenses.
Frequently Asked Questions
- Where can I find the main shutoff valve in my home?
The main shutoff valve is typically located in the basement, crawl space, or outside near the foundation of your home. It’s essential to check these areas to ensure you can quickly access it during emergencies.
- What should I do if my shutoff valve is stuck?
If your shutoff valve is stuck, try applying a suitable lubricant to loosen it. If that doesn’t work, it’s best to call a plumbing professional to avoid causing any damage.
- How can I tell if the water supply is completely shut off?
After turning off the valve, turn on a faucet to check for water flow. If no water comes out, you’ve successfully shut off the supply. This is a crucial step to prevent any surprises!
- What should I do in case of a burst pipe?
In the event of a burst pipe, immediately shut off the main water supply to prevent further damage. Then, call a plumber for assistance and assess the situation carefully.
- Is it necessary to drain the plumbing system after shutting off the water?
Yes, draining the plumbing system is important, especially in winter, to prevent pipes from freezing. Make sure to follow proper procedures to drain your pipes safely.


